I have chosen to cut Afternoon Dress this because I imagine there is a challenge in managing the large pieces of calico form shoulder to floor, and create a good fit in a dress with a slim waist without a seam in the waist except the one dart in the front.
I have never tried to interpret pattern diagrams like this before and is looking forward to gain the skills to put all this historical reference in to 3D.
The patterns in Nora Waughs books are precise copies original garments.
Something to consider when starting putting this dress into 3D is if the dress should have exact the reference`s measurement or if it is a guideline of proportions, as a modern model/actress would not have previous owners measurements.
Nora Waugh`s notes on the dress:
Afternoon Dress( Bustle) c.1878. The Central School Of Art and Design, London.
A dress of cream taffeta, with a scarf draperu of dream silk in an open lace pattern. The bodice is lined with white cotton to the hips and boned at the center back (21,5 ") underarm (6,5


First Cut on stand.
Front: First experience was to set aside habitual thinking about good fit and where to put seams. This dress takes a lot away under the bust with two vertical and one horizontal dart and in the CF seam, but it has no dart over the bust.
Graham pointed out to me that the reference showed that the dress padded out by the armhole and this would fill out some of the excess. The rest is `dealt` with by pulling and stretching the fabric.
Back: I realized after having worked a long time in the large back piece that the direction was wrong, this had effect only in the upper part and I was unwilling to unpin and redo 2,5 m calico and 2,5 hours work so I left it to alter on the table.
![]()


Alterations on table:
Added volume to the trail by tilting the CB about 40 cm at hem.
Tidied up the lines in the front darts, almost all the sides didn`t have the same length.
Cut out the excess length in the long parts in the back which I could not get to fit on the stand.
First sewn toil on stand.
For an inexperienced eye it makes a great difference to have a whole dress rather than a half… The choice of adding volume to the trail was good.
Seeing the all four darts in the front showed that the darts where too close to the CF and too close to each other in comparison with the reference pictures. The horizontal dart had to be lifted 5 cm to actually sit in the waist, as in the reference.
I only pinned the shoulder seem as I was sure it would need adjusting due to the larger alterations on the back. This made it easy to open up and smooth over the chest and shoulder blades and fit in place.
![]()


The Sleeves
For the sleeve I tried to copy the sleeve in the book rather than adapt a contemporary two piece sleeve. I wanted to try out the technique of blowing up the little pattern to a full size because I have never tried it before and because I expected it to take less time.
First I made the mistake of not seeing Nora Waugh`s sleeve as a pattern. I found a very similar sleeve in Janet Arnold and copied that successfully on homemade inch-squared paper. I realized my mistake though when I tried to extend the ¾ length sleeve to a full length and found that difficult. After advice from Dexter I saw that the sleeve illustrated by Nora Waugh was an actual pattern drawn out. I didn’t see this the first time because under and over sleeve has equal width.
![]()

Then I drew up the right sleeve for the dress, this was both quick and relatively easy. I adjusted the armhole from 41 cm to 44 cm to fit the armhole in my toil, making sure only to extend the width of the wrist from 23 cm to 24 cm
When I pinned the sleeve to the dress I was puzzled to find that it didn’t hang down close to the body, but stood out. I learned from Graham that this was due to an in build gusset in the under sleeve, which is there to allow for movement for the wearer of the dress.
. (in the unlikely event that the lady wearing this Princess dress for an afternoon tea party should need to lift her arms)
![]()
![]()


The little collar I also cut on the table. It took a few attempts to get it to sit right and it reminded me to lower the neckline. Even though this particular dress is cut on the stand the ultimate purpose for this work is for an actress to wear it and her comfort should be considered.
Draping the two large pieces that goes around the skirt of the dress, called after a while, for a little reflection on the limitations of calico. The top piece is a lacy shawl, and even when i had washed the light weight calico I had chosen for this purpose it was still very difficult to make it drape to replicate the illustration. For the purpose of this project I have pushed the pleats in the seem so the fabric is almost bias on the line where it is sewn into the dress, this made some of the excess fabric disappear. I think; if this was to be made up in real fabric the draping would have to arranged in the final lace by the maker. If the draping should be on for a fitting for the designer to view it could just be pinned on as it is basically just two large square pieces that can be arranged and rearranged without cutting in to it.
The dress stood for two weeks on the stand with the draping, and in that time the light calico colapsed and looked awfull. How is that solved for a dress in real use. Even with a hundred little swing catches hidden to secure the draping it would stil `hang`after a while. Perhaps startch and keep it lying when not in use...
I worked out after a while and with Dexters help that `self silk`most likely means; the same silk as the dress is made of. -for Nora Waugh anyway.


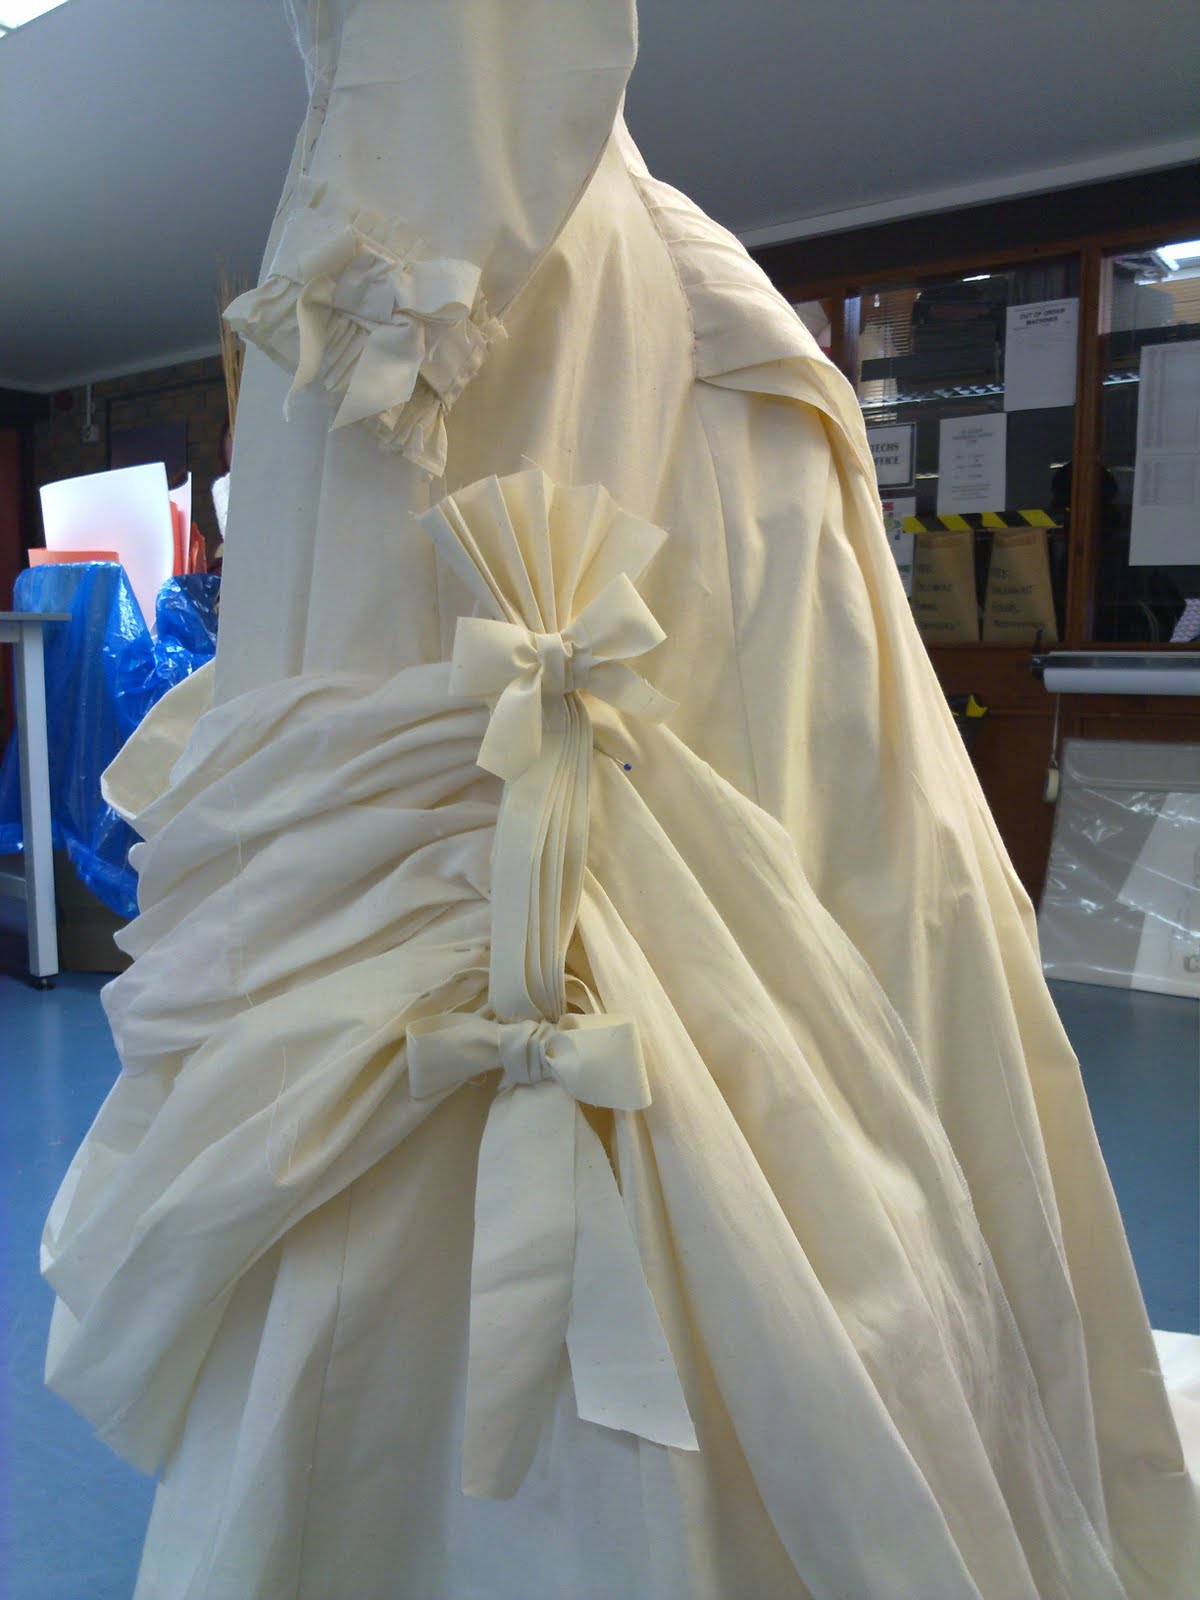
Trimmings.
The dress is decorated with pleats and bows on the sleeves and the hem. For this I just improvised and fiddled with the calico to replicate the drawing. The large trim for the hem took a few experiments but I think I came up with something absolutely acceptable.


Reflect on project
Experience Experience Experience ……
The effect is attractive when the same piece of fabric floats in to curves and out on bustles but it takes practice to foresee the effect, of what one is doing in one end, is going to be in the other end.
After I have made this dress I am very glad I finally got started on cutting period dress on stand, I can see it takes a lot of doing and redoing to gain the experience to work efficiently with books, fabric and stand.
Remember
· Prepare by looking at other pieces alike before jumping in to the actual cutting, and keep at hand doing the work.
· Do a proper and relevant understructure.
· See when calico is not the right fabric to work and find a substitute.
· I work well with both table and stand. -when I get stuck on the dummy I take it of the solve it on the table and vice versa.
I also learned that it takes experience to interpret the illustrations in Nora Waugh`s books. The drawing of the draping in the front looked more like a apron than the large lush pleats she describes in the text. My calico stood out like an oversized pocket. After a long! And hard stare, Dexter worked out that vertical line in the illustration was an indication of a pleat which stopped the horizontal pleats coming from the side and took away the `pocket` excess. I could have spend a day in the library and not worked that out, and makes me wonder I haven´t thought about finding a photograph of the dress, which there must be somewhere when the dress is still in The London School of Art and Design.
hmm.. thoughts for research
hmm.. thoughts for research
Hi! I'm a student of Fashion Technology in Polimoda,Florence and I would like to copy this Nora Waugh dress like you did, but I couldn't find the photos of the real one, have you find some?
ReplyDeleteشركة تسليك مجاري بالدمام
ReplyDeleteشركة المثالي سوبر لخدمات المنازل
شركة كشف تسرب المياه ببريدة
شركة كشف تسربات المياه بالدمام
التخلص من رائحة الحمام بالخبر
شركة المثالي سوبر للخدمات المنزلية
شركة مكافحة حشرات بنجران
شركة كشف تسربات المياه بخميس مشيط
شركة كشف تسربات المياه بابها